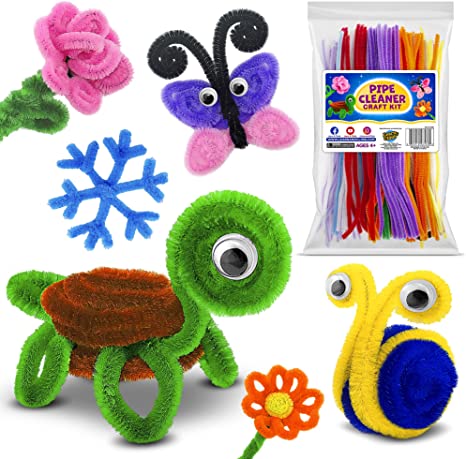
Pipe Cleaner Crafts for Kids
Did you know that turtles date back to the age of dinosaurs? We’ve had years to study these amazing animals. No wonder they are popular animals among the youth and adults! If you are a turtle lover, you’ll love sharing this easy craft with your child. Take a look on how to make this adorable pipe cleaner turtle!
🐢 More Turtle Fun Facts!
It may appear that turtles “come out of their shell” when they extend their necks out but, in fact, turtles can not actually leave their shell. A turtle’s shell is a part of them, like any other body part!
How to Make a Pipe Cleaner Turtle:
1. The materials you’ll need for this craft are two brown pipe cleaners for the turtle’s shell and two green pipe cleaners for the turtle’s body. You’ll also need scissors, googly eyes, and glue dots!

2. Curl the brown pipe cleaners into two swirls. TIP: Tuck the end of the pipe cleaner on the outer ring to secure in place.

3. We’ll need to cut down the green pipe cleaners to size. Cut one of the pipe cleaners into quarter pieces (3” pieces). With the second green pipe cleaner, cut in half. Put one half to the side for now, and cut the other half in half one more time! You’ll have six, 3” pieces altogether.

4. Bend the small green pipe cleaner pieces and twist at the ends. Take one of these tear-shaped pieces and squish into a thinner piece (this piece will be the tail). Now you have one tail, and four turtle legs - keep the left over one just in case!

5. Remember the green pipe cleaner we set aside? We’ll use this to make the head and body of the turtle! Curl one end of the pipe cleaner at about a quarter of the way down. Slightly bend middle of the body up to create a neck.

6. Take the small tail and attach the stem of the turtle body by twisting it together.

7. Turtle needs to be able to move so let’s attach the legs next. Twist each leg on the stem (body) of the turtle - two on either side.

8. A turtle is not complete without it’s shell! Place one brown shell swirl down and apply glue dots along the center. Lay the turtle body on top of the glue dots.

9. Add more glue dots on top of the turtle body and place the second shell on top.

10. Complete Turtle with googly eyes on either side of his face! Look how cute he is! He’s already on the move and checking out some books to read later.

Take a look on how to make Turtle from start to finish!
Create Turtle and other fun animals with the Pipe Cleaner Craft Kit! The perfect gift to give a creative and curious young one. Googly eyes, glue dots, and a variety of pipe cleaners are included in each kit!